Friday, January 4, 2008

Spaghetti With Aspragus and Shrimp


Having eaten rich foods over the holidays, I wanted to eat something lighter (without raiding my birds' seed mixture).

Up here in Canada, we've been getting some decent produce from South America (primarily Chile), due to it's growing season being the opposite of Canada's.

For the past couple of weeks, I've noticed some decent and affordable asparagus in the market and I've enjoyed them in fritattas, as a side veggie dish and today, in pasta.

This dish is light, has no cheese and is refreshing with the aroma of lemon zest and the zing of paprika and chile flakes.

I also find that many of the best pasta dishes are the simple, quick ones where the sauce is ready in the time it takes for the pasta to be cooked. This spaghetti dish is one of those simple delights.

Spaghetti With Asparagus and Shrimp
(for tw0)

1 dozen shrimp, peeled and de-veined
salt
1 tsp of paprika
1 tsp. of chile flakes
1 dozen asparagus spears, wood parts trimmed and then cut into 1 inch pieces
1/3 cup olive oil
3 cloves of garlic, smashed
1 small red onion, diced
1/4 cup white wine (Chardonnay)
zest of 1 lemon
juice of 1/2 a lemon
some pasta water
2 handfuls of spaghetti

  1. Get a large pot of water boiling for your pasta. When the water begins to boil, add a generous amount of salt and cook your pasta according to the package's instructions.
  2. In a bowl, toss your shrimp with some salt, paprika and chile flakes. Place a skillet on a burner on medium high-heat and pour in your olive oil. Add the shrimp and saute until they've just turned pink (about 2 minutes). Remove your shrimp with a slotted spoon and reserve.
  3. In the same skillet add your garlic, onions and asparagus and saute them on medium heat for about 5 minutes (or enough to soften).
  4. Add your wine and reduce until there's barely any liquid left. Take the skillet off the heat and reserve (you may remove the garlic, if you wish).
  5. As soon as your spaghetti is cooked, reserve some pasta water and strain the spaghetti.
  6. Place you skillet back on the burner (heat off) and add your pasta, shrimp, zest and lemon juice and toss to coat the pasta with the remaining ingredients. Add some pasta water if the sauce is too dry.
  7. Serve with a nice Chardonnay.

Thursday, January 3, 2008

The Ultimate Cheesecake


I've been enjoying this recipe for cheesecake for a few years. It's simply the ultimate, as in Tyler Florence's Ultimate Cheesecake.

Just by merely looking at the Wikipedia entry on cheesecake, I learned that there are many approaches to cheesecake from many countries , that cheesecakes were even being made in Greco-Roman times!

It appears that the version I'm showing you today follows the Ann Arbor-style of cheesecake. Cheesecake has to one of my favourite desserts. I love the sweet and sour one gets with each velvety taste.

Another thing I love about this recipe is that it also shows you how to make the blueberry topping. No more tinny fruit toppings here.

The next time you have to bring a food or dessert item as a host/hostess gift, try Tyler's Ultimate Cheesecake...they'll ask you for the recipe!

Wednesday, January 2, 2008

Seafood Croquettes


I do enjoy my seafood and one has an excuse to splurge on more expensive seafood during the holiday season.

If your budget allows, you can certainly go 100% with crab meat for this appetizer (or main) but this seafood alternative is delicious, relatively easy and not too hard on the budget.

I've tried many crab, seafood, cod cakes and often there is too much filling or they fall apart or they are greasy from being fried. I think I've avoided all these problems with this seafood croquette.

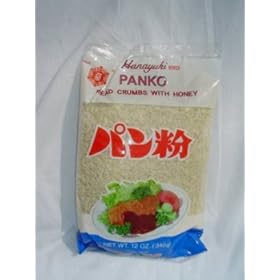
After trying different approaches to seafood croquettes (cakes), I've found boiled, mashed potato to work best as a binder. I'm also a big fan of Japanese Panko Flakes and if one is to use breading in a recipe, Panko is the way to go!

Late last year, I showed you my Mustard Skordalia and I recently served it alongside with the seafood croquettes. They made a perfect match!

Finally, my recipe is a "no fry" croquette. These are decadent enough so, to offset any guilt from eating these, I baked them so as no one will hesitate to come back to the tray for more.

Seafood Croquettes
(makes 2 trays)

400gr. good quality crab meat, shredded
400 gr. of de-boned salt cod
400 gr. of shrimp, peeled and de-veined

400 gr. of bay scallops

4 medium potatoes

1/4 cup olive oil

1 large onion, diced

1 red bell pepper, diced

1 stalk of celery, diced

2 scallions, finely diced

1/2 cup of mayonnaise

1 Tbsp. Dijon mustard

2 tsp. salt

2 tsp. black pepper

2 tsp. paprika
1 Tbsp. Herbs de Provence

juice of 1/2 lemon
Panko bread crumbs

cooking spray

400F ov
en

  1. The day before you are to make your croquettes, soak your salt cod in a bowl of water and change the water every few hours to draw the salt out of the cod.
  2. Boil the cod in water for about 5 minutes, let cool and reserve.
  3. Peel and place your potatoes in boiling salted water for 15 minutes. Drain the water and mash the potato. Reserve.
  4. In a large skillet, pour in your olive oil on medium-high heat. Add your onion, celery, red pepper and reduce to medium heat and cook to soften for 10-12 minutes. Add your scallions, mix in well and take of the heat and allow to cool.
  5. Peel, de-vein and rinse your shrimp, rinse your scallops and shred your boiled cod fish using your hands. Pat dry all seafood of any excess water. Roughly chop your shrimp and scallops (rough dice).
  6. Into a large bowl, add your seafood, mashed potato, cooled sauteed vegetables, mayonnaise, mustard, salt, pepper, herbs de provence, paprika, lemon juice and mix all the ingredients well with your hands.
  7. Make one croquette and fry it off to taste test for seasoning and binding. Adjust accordingly with salt and pepper and you may add some bread crumbs if the mixture is too wet.
  8. Using your hands, form the mixture into patties. In another bowl, pour in your Panko bread crumbs.
  9. Coat your seafood croquettes well with the Panko bread crumbs and place on a baking tray that's been treated with cooking spray.
  10. Bake on the middle for 12-15 minutes, then flip the croquettes and bake for an additional 12 minutes. Serve warm with Mustard Skordalia.

Tuesday, January 1, 2008

Vassilopita


Happy New Year to everyone and health and happiness in 2008!

I'll make this brief as I have guests arriving soon but I'd like to share with you the background behind Greeks' cutting of the New Year's cake, as related by Nancy Gaifyllia from www.about.com:

As the New Year rolls over, Greek families all over the world will share the tradition of cutting the Vassilopita, our Greek New Year's cake. January 1st is the name day (saint's day) of Aghios Vassilis (St. Basil), the Greek Santa Claus, and the cake is named in his honor. While Christmas is a more solemn occasion, January 1st is filled with celebrations and the exchange of gifts.

However it's fixed, cutting the Vassilopita is a celebration of wishes for the new year.

Each Vassilopita is baked with a coin or medallion hidden inside which, according to tradition, will bring great good fortune in the new year to the person who gets it, so the cutting is all-important and the focus of great scrutiny! Traditionally, pieces are cut ceremoniously by the head of the household and allocated to the church (Holy Trinity and Virgin Mary), then the head of the household (male), his wife, their children (oldest to youngest), other family members by degree of relatedness, then guests.

Vassilopita

500 gr. unsalted butter
600 gr. sugar

650 gr. all purpose flour

12 eggs (whites & yolks separated)

2 shots of orange liquer

2 heaping Tbsp. of baking powder

zest of 2 oranges


Pre-heated 350F oven

  1. Whip your egg whites into a meringue and reserve.
  2. In a large bowl, use a mixer to blend the butter, sugar and add eggs, one at a time.
  3. Add the liquer and the zest.
  4. Add the flour and baking powder
  5. Slowly fold the meringue into the batter.
  6. Place a foil-wrapped coin randomly into the cake mix.
  7. Bake on the middle rack for 50 minutes.
  8. Let cool on a rack for an hour.
  9. Make a paper stencil of the new year you're celebrating, place it on the cake and dust the top of the cake with icing sugar. Remove stencil and reserve to cut at New Year's.